The Goal
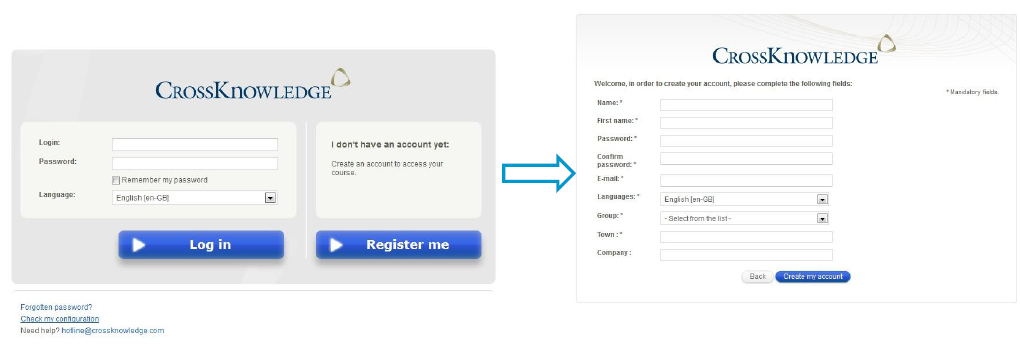
The loginbox is a page that allows the learner to login with his account or create one if he has no account on the LMS.
First, to display the loginbox, you need to set some mandatory parameters :
| Parameters | Description |
|---|---|
| Loginbox | Set the value to yes to display the login page that allows the learner to login or create an account. |
| Hash | The hash has to be a md5 of the API key plus the string parameters, as seen here |
Because there is no notion of login, when the learner will create his account, the mail field will always be displayed (it’s not possible to remove it except if you set the email in the url parameters). Then he will receive an email to confirm his inscription with an SSO to connect himself to the LMS. - But if you want the learner to have a specific login, you can add in the url.
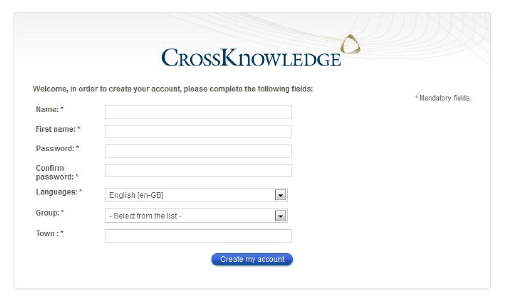
As you can see, there are couples of mandatory fields. This fields come from two locations:
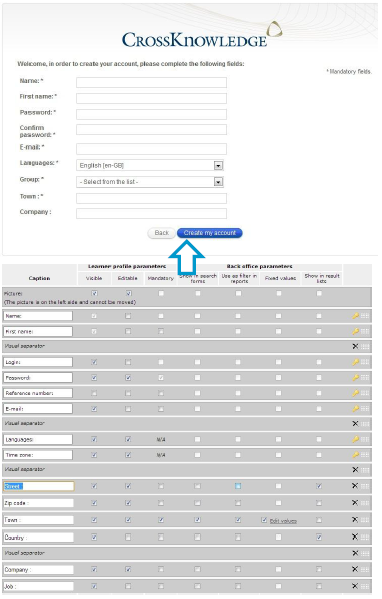
- Main mandatory parameters set in the url, here name, firstname and languages with @ (there is an exception for custom values (see page 5 : here Company) and group). - The others mandatory fields are defined in the All users group (here Password and Town). If you set other mandatory fields in sub group, they will not be displayed in the form.
To end this part on the loginbox, there are two features :
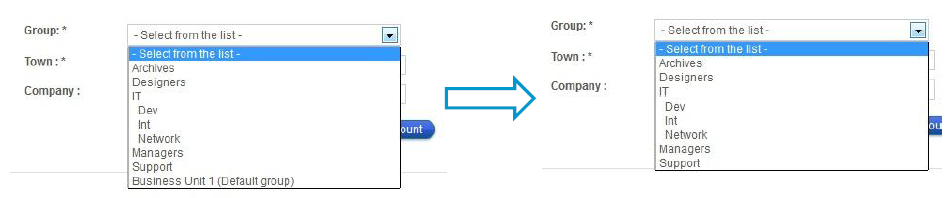
- The entity selection. In the page 5, there are two parameters to set the entity the learner will be registered in.
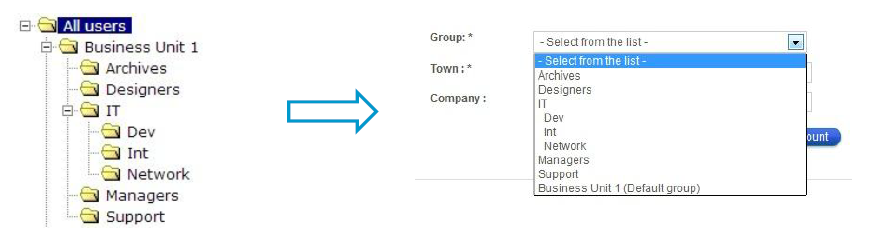
In the loginbox, you can let the learner choose is own entity. By default the entity selection is not displayed and learner are registered in All users. To display the entity selection add in the parameters group_list=id_of_the_group where the id_of_the_group is the root entity and all sub group will be shown. For example here are my entity on the left side. If I write group_list=122 wich is the id of the Business Unit 1, all groups and their sub groups will be displayed like the right part. Note : The id 1 always refer to All users entity.
- If you don’t want the learner to register himself in the defined root group (here Business Unit 1), but force him to register in a sub group, you can add in the parameter restrictGroupList=Y.
Final notes :
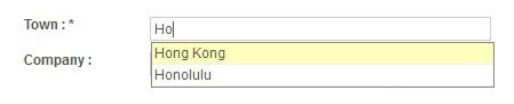
- The loginbox takes the locale of the browser. If you want to force a locale, add in the parameters langcode=en-GB to force english for example. - The auto complete for custom values works in the loginbox. The configuration is in entity customization. The loginbox auto complete works only for the All users custom fields.
- All others parameters for SSO (learner’s data, training and session registration, security) still work with the loginbox. - Here is the link I used to display the loginbox in this documentation (the learner is redirected to the session 162 when his registration is done) :
http://my_instance.crossknowledge.com/sso/hash/df487c8f1bbee3d5e077f2c1ea83c69d445058a3/enroll/yes/session/162/name/@/firstname/@/group_list/122/languages/@/594A2808-83EE-6234-EA95-DB9CEB40F7EF/@/loginbox/yes If you want to force registration and only display the registration form without the login page, don’t set the loginbox=yes (see learner’s data). The back button will disappear.